
At some point, almost every Houston homeowner who's considered refreshing their kitchen has the same thought: how hard could it be? A few weekends, some good paint, maybe a YouTube tutorial. Then reality arrives. The finish looks brushy. The paint chips at the door edges within months. The grain shows through. Doors stick. Colors look uneven.
This isn't a knock on homeowners who try. Cabinet painting done right is genuinely hard, and it requires equipment, products, and techniques that most people don't have access to or experience with. Understanding exactly where DIY attempts go wrong — and what professionals do instead — helps you make a smarter decision before you invest time, money, and a weekend of frustration.
Why Cabinet Painting Is Harder Than Wall Painting
Walls are forgiving. Slight roller texture, a minor lap mark, a touch-up that doesn't quite match — most of these are invisible at normal viewing distance. Cabinets are different in almost every way. They're handled daily. They slam, they rub together, they get hot near the stove and damp near the sink. And they're viewed up close, where every imperfection is visible. What works for walls fails on cabinets.
The 7 Reasons DIY Cabinet Painting Fails in Houston Homes
Skipping Degreasing — The Invisible Killer of Adhesion
Kitchen cabinets accumulate grease and cooking oil that's largely invisible. Paint cannot adhere to a greasy surface — it may look fine for weeks, then begin lifting and peeling at the most-handled spots. Thorough commercial-grade degreasing before any sanding is foundational, not optional.
Inadequate Sanding — Paint That Won't Stay
Existing finishes are smooth, often glossy surfaces that new paint cannot grip without mechanical preparation. DIY painters often sand lightly or not at all. The result is paint that peels at the most-touched spots within months. Every door, drawer front, and frame section needs to be sanded.
Wrong Primer — Especially Disastrous on Oak
Oak contains tannins that bleed through standard primers and create yellowish staining, and open grain that telegraphs through paint if not filled. A tannin-blocking primer and grain filler are standard for pros but rarely mentioned in DIY tutorials — extremely common in 1990s-2000s Katy and Sugar Land cabinetry.
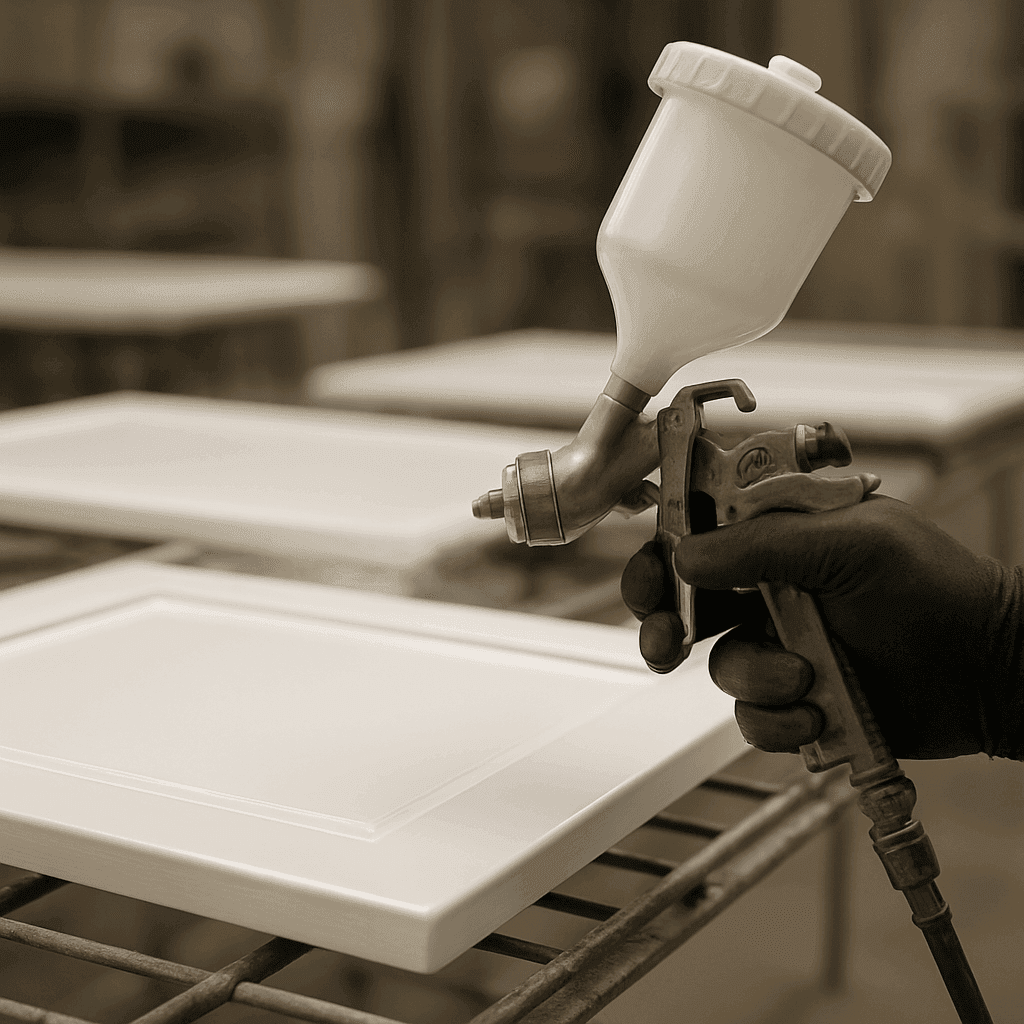
Brush and Roller Application — The Look That Says 'Painted'
This is the single most visible difference. A brush or roller leaves texture that's obvious on cabinet doors viewed inches away. Professionals use airless or HVLP spray equipment for a smooth, factory-like finish. The application method is the giveaway.
Cabinet Doors Painted In Place Instead of Flat
Pros remove every door and drawer front and spray them flat — horizontally, so gravity works in favor of an even finish. Painting vertically (on hinges or leaned against a wall) causes drips, runs, uneven coverage, and hardware damage.
Using Interior Wall Paint Instead of Cabinet-Specific Products
Standard latex wall paint never achieves the hardness needed for surfaces opened, closed, bumped, and cleaned daily. Professionals use waterborne alkyds, lacquers, or high-quality cabinet enamels that cure to a hard, durable finish — often not sold at consumer retail.
Rushing the Process — Especially in Houston's Humidity
High ambient humidity slows curing and can prevent proper bonding. Paint applied in uncontrolled garage or kitchen conditions can feel dry but cure poorly, leading to a finish that stays soft and chips far sooner than it should.
What Professionals Do Instead — The Full Process
Here's what a professional cabinet painting job looks like from start to finish:
Complete disassembly — all doors, drawer fronts, and hardware removed
Thorough degreasing — commercial-grade cleaner on all surfaces
Sanding all surfaces — 120–180 grit to create mechanical adhesion
Grain filling (on oak) — fills open grain for a smooth substrate
Tannin-blocking primer (on oak or problem substrates) — prevents bleed-through
Standard bonding primer on all surfaces — base for finish coats
Flat spray application of finish coats — doors horizontal on spray racks
Two finish coats with appropriate dry time between them
Light scuff sand between coats if needed for adhesion
Reinstallation of doors, drawers, and hardware (new hardware if upgraded)
That's a multi-day process. It's why professional cabinet painting costs what it does — and why the results look the way they do.
The True Cost of a Failed DIY Attempt
The frustration of a DIY result that doesn't meet expectations is real, but there's also a concrete financial cost: $150–$400 in paint and supplies, 2–4 weekends of intensive effort, $50–$100/day if renting a sprayer (plus a learning curve and product waste), and — if the result fails — the added labor for a professional to strip and redo it. Many professional painters charge more to repaint cabinets that were DIY-painted over incorrectly than they charge to start from scratch. The economics often end up favoring professional cabinet painting from the start.
When DIY Cabinet Painting Can Work
To be fair: there are situations where a careful, well-prepared DIY attempt can yield acceptable results — small-scale projects like a bathroom vanity or laundry room cabinet, painted MDF or thermofoil in good condition, if you own a quality sprayer and have practiced with it, or if you're choosing a dark color where imperfections are less visible. For a full kitchen cabinet repaint — especially on oak — professional painting is almost always the better investment.
Frequently Asked Questions
Is it possible to fix a bad DIY cabinet paint job, or do you have to start over?
It depends on the extent of the failure. Minor imperfections in an otherwise sound DIY job can sometimes be addressed with additional prep and a professional finish coat. If the existing paint is lifting, chipping, or peeling, it typically needs to be stripped back before proper painting can begin — which is more labor-intensive than starting from scratch.
What's the biggest single mistake DIY cabinet painters make?
Using a brush or roller instead of spray equipment is the most universally visible mistake — it's what makes most DIY cabinet jobs look like DIY cabinet jobs. A close second is failing to properly degrease surfaces before any prep work begins.
Can I rent spray equipment and do this myself?
Rental sprayers are available, but using them correctly requires practice. Spray distance, overlap pattern, product thinning, and technique all affect the result significantly. Many homeowners who rent sprayers for the first time experience runs, uneven coverage, or overspray on surfaces that weren't properly masked. If you're committed to DIY, consider practicing on scrap material first.
What paint should I actually use if I do attempt DIY cabinet painting?
Use a waterborne alkyd enamel specifically designed for cabinets and trim — not standard interior wall paint. Brands like Benjamin Moore Advance and Sherwin-Williams Emerald Urethane Trim Enamel are formulated for hardness and durability far beyond standard interior paint. Pair with a shellac-based primer on oak surfaces.
How long should I wait before using cabinets after painting?
Even after paint feels dry, the finish continues curing. Most professional cabinet finishes need 7–14 days before they reach full hardness. During this period, handle doors gently and avoid cleaning with anything other than a very lightly damp cloth. Full cure time before heavy cleaning is typically 30 days.